Data tables, as discussed in the earlier sections of this chapter, let you perform what-if analysis when you change one variable and explore the effect on a small handful of formulas or when you change two variables and explore the effect on a single formula. But this approach doesn’t work except in the simplest of situations. In most complex situations, you’ll want to change several variables at a time and explore the effect on large numbers of formulas.
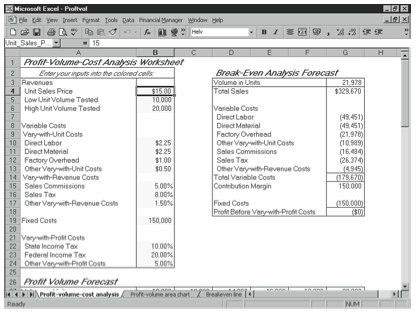
Suppose, for example, that you’re using a workbook like the one shown in Figure 6-7 to perform break-even analysis. Each of the values in the worksheet range B4:B24 is an in- put to the formulas that show in the break-even analysis schedule contained in D2:G18. If you want to test several sets of input values, use Scenario Manager.
Creating a Scenario
To use Scenario Manager, you create sets of inputs called scenarios. To create a scenario, follow these steps:
- Choose the Tools menu’s Scenarios command.
Excel displays the Scenario Manager dialog box. - Click the Add button.
Excel displays the Add Scenario dialog box, shown in Figure 6-8.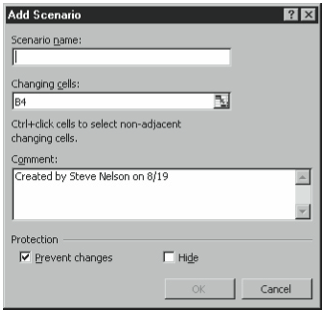
Figure 6-8. The Add Scenario dialog box. - Name the scenario.
Give the scenario a name by typing a description in the Scenario Name text box. - Identify the scenario inputs.
Enter the worksheet range that holds the cells you want to change in the Changing Cells text box of the Add Scenario dialog box (see Figure 6-8) by using the mouse to select the worksheet range. If you want to enter several worksheet ranges, as would be required for the worksheet shown in Figure 6-7, hold down the Ctrl key as you select ranges. When you finish, click OK. Excel displays the Scenario Values dialog box (see Figure 6-9).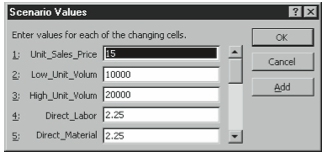
Figure 6-9. The Scenario Values dialog box.
Using a Scenario
Once you’ve created a scenario—again, this is just a set of input values—you can tell Excel to use the input values. To use a scenario, follow these steps:
- Choose the Tools menu’s Scenarios command.
Excel displays the Scenario Manager dialog box, which will now show the newly created scenario (see Figure 6-10).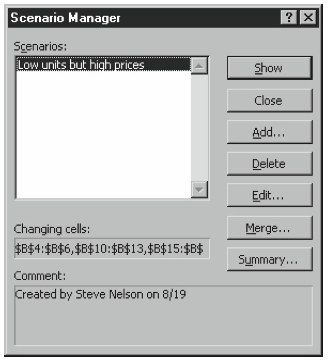
Figure 6-10. The Scenario Manager dialog box. - Select a scenario.
Select the scenario you want to explore by clicking its name in the Scenarios list box. - Click the Show button.
Excel inputs the scenario values in your workbook and recalculates its formulas. You can repeat this step to experiment with or explore other scenarios. When you finish, click Close.
Editing a Scenario
As you would suspect, you can rather easily edit the scenarios you’ve created. You can also easily remove scenarios you no longer want to work with.
To remove an existing scenario, choose the Tools menu’s Scenarios command so that Ex- cel displays the Scenario Manager dialog box. Then select the scenario you want to delete, and click Delete.
To edit an existing scenario, follow these steps:
- Choose the Tools menu’s Scenarios command.
Excel displays the Scenario Manager dialog box. - Select a scenario.
Select the scenario you want to edit. You can do this most easily by clicking. - Click the Edit button.
Excel displays the Edit Scenario dialog box, which closely resembles the Add Scenario dialog box shown in Figure 6-8. - Optionally, edit the scenario name.
You can do this by editing the contents of the Scenario Name text box. - Optionally, change the scenario inputs.
You can do this by editing or replacing the worksheet range or worksheet ranges shown in the Changing Cells text box of the Edit Scenario dialog box. When you finish, click OK. Excel displays the Scenario Values dialog box (see Figure 6-9). - Provide the input values.
Edit or replace the input values you want to use for each scenario value. Click OK when you finish, and Excel redisplays the Add Scenario dialog box.Repeat steps 2 through 6 to edit additional scenarios. After you complete step 6 for the last time, click Close.
Summarizing Scenarios
Excel’s Scenario Manager includes a Summary feature, which you can use to create either a separate worksheet or a PivotTable that lists selected input values and formula results. To create such a summary, follow these steps:
- Choose the Tools menu’s Scenarios command.
Excel displays the Scenario Manager dialog box. - Click the Summary button.
Excel displays the Scenario Summary dialog box, which asks whether you want to dis- play a scenario summary or a PivotTable. Select the button that corresponds to the type of scenario summary you want. Then click OK. - Click the Summary button.
Excel displays the Scenario Summary dialog box (see Figure 6-11), which asks whether you want to display a scenario summary or a PivotTable. Select the option button that corre- sponds to the type of scenario summary you want. Do not click OK until after step 4.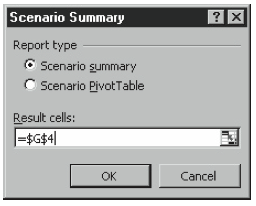
Figure 6-11. The Scenario Summary dialog box. - Select the Result cells.
Specify which Result cells you want to see in the summary—these are the cells with the formulas that change as you explore different scenarios—by selecting them with the mouse. You can select nonadjacent cells by holding down the Ctrl key as you click. Click OK when you finish. Excel adds a scenario summary to your workbook that shows the scenario values and the selected Result cells (see Figure 6-12).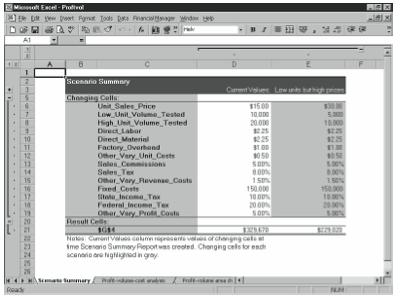
Figure 6-12. A Scenario Summary worksheet.
Merging Scenarios from Other Workbooks
If two workbooks use the same set of input cells, you can copy, or merge, a scenario from one open workbook to another open workbook. To merge scenarios, follow these steps:
- Activate the workbook to which you’ll add a scenario.
When you merge scenarios, both workbooks need to be open, and you work from the workbook to which you’ll add the scenarios. If you have questions about how to open a workbook or how to make a workbook active, refer to Chapter 2. - Choose the Tools menu’s Scenarios command.
Excel displays the Scenario Manager dialog box. - Click the Merge button.
Excel displays the Merge Scenarios dialog box (see Figure 6-13).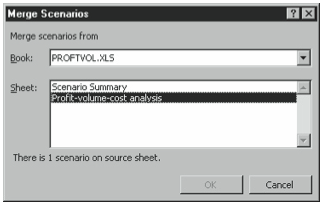
Figure 6-13. The Merge Scenarios dialog box. - Identify which workbook holds the scenarios you want.
Use the Book list box to select the workbook from which you want to retrieve a scenario. - Identify which scenario you want.
Use the Sheet list box to select the scenario you want to retrieve. - Click OK.
Excel merges the scenarios from the source workbook into the active workbook. You can now use these scenarios in the same way as those you create from scratch.
Leave a Reply