Excel provides several useful tools for sharing your actual workbooks, rather than just the information they contain. You can tell Excel to save or open workbooks in formats accept- able to other spreadsheet programs. You can direct Excel to save your workbooks on a net- work drive and then make the workbook simultaneously available to multiple users. And you can use electronic mail as a means of passing a workbook to other users.
Sharing Excel Workbooks with Other Programs
You can rather easily share an Excel workbook with other spreadsheet programs. You can, for example, export an Excel workbook so someone using Lotus 1-2-3, another popular spreadsheet program, can open and work with the workbook. And you can also easily im- port spreadsheet documents created by other programs into Excel. For example, you can import a Quattro Pro workbook into Excel.
Exporting a Workbook
To export a workbook, you use the File menu’s Save As command. When Excel displays the Save As dialog box, save the workbook file in the usual way—except use the Save As Type drop-down list to specify the file format as one acceptable to the other program (see Figure 7-7). For example, if you want to export an Excel workbook to Lotus 1-2-3, choose the appropriate 1-2-3 file format.
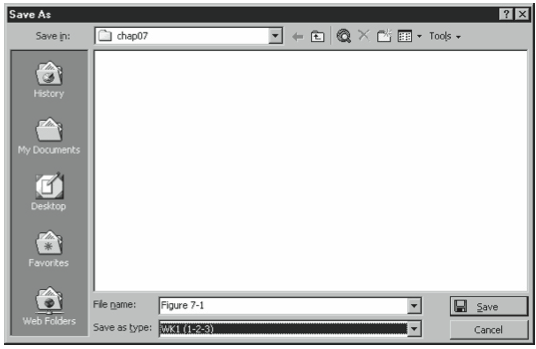
If you can’t determine the appropriate file format for the exported workbook file, you can try one of two tactics: You can use a simple standard spreadsheet format such as the tab- delimited format or the CSV (or comma separated value) format, which all spreadsheet programs understand. Or you can use a popular spreadsheet format, such as the Excel 95 file format or the Lotus 1-2-3 version 3 file format, which almost all spreadsheet programs understand.
Importing a Spreadsheet Document
To import a spreadsheet document, you use the File menu’s Open command. When Excel displays the Open dialog box, you open the to-be-imported document in the usual way— except you use the Files of Type drop-down list to specify the file format of the document you want to import (see Figure 7-8). For example, to import a Lotus 1-2-3 spreadsheet document, select Lotus 1-2-3 Files from the list.
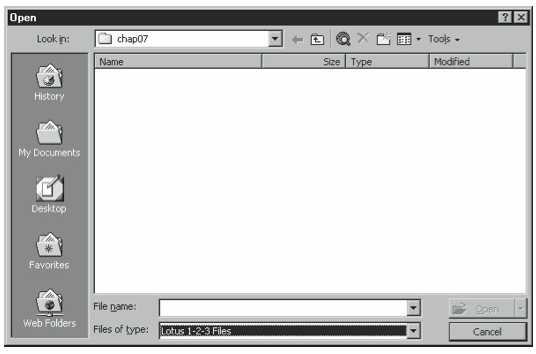
It’s unlikely but not impossible that Excel won’t recognize the other spreadsheet program’s file format. In this case, before you save the spreadsheet document using this other spread- sheet program, you may need to choose a file format that Excel understands such as any version of Excel, any version of Lotus 1-2-3, or a standard simple format such as CSV or Tab-delimited
Sharing Excel Workbooks Over a Network
You can share an Excel workbook with other Excel users over a network. In a nutshell, all you have to do is save the workbook in some accessible location, such as on a network drive or a shared local drive. With a workbook located on a network or shared local drive, net- work users with the appropriate level of authority and the requisite permissions can open, edit, and save the workbook.
If you do share a workbook over a network, you should be aware of a couple of points. First, and in general, if one user opens a workbook, other people can’t open that same workbook except as a read-only document. What that means is that the person can’t save the work- book using the same, original filename. The user can, however, save the workbook using a new filename or in a new location.
Excel tells you when you attempt to open a workbook that it’s already being used. It then gives you the option of opening the workbook in read-only mode (see Figure 7-9). You also have the option of asking Windows to notify you when the workbook document is fully available.
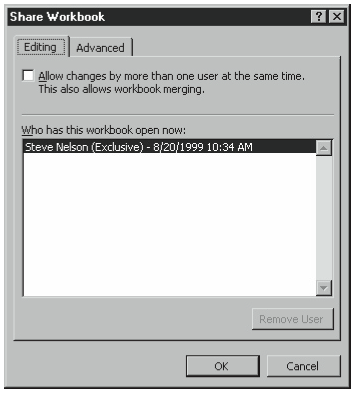
The second point you need to know about sharing a workbook over a network is that you have the option of telling Excel it’s okay for multiple users to open and make changes to the same workbook. I can’t emphasize enough that this option is extremely difficult to suc- cessfully use in a real-life work setting. You can just imagine all the trouble that can occur if people start making the same sorts of changes to the same parts of a workbook. If you want to do this, however, choose the Tools menu’s Share Workbook command. When Excel displays the Share Workbook dialog box (see Figure 7-9), select the Allow Changes By More Than One User At The Same Time check box.
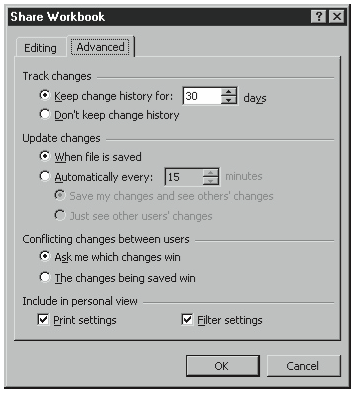
You can control many aspects of Excel’s workbook sharing by using the Advanced tab of the Share Workbook dialog box (see Figure 7-10). The Track Changes options, for example, let you tell Excel that it should keep a list of the changes made to a shared workbook and for how long this list should be kept. The Update Changes options let you specify when and how the shared workbook is updated for the changes that people make. Finally, the Con- flicting Changes Between Users options let you specify what should happen when changes from different users are in conflict.
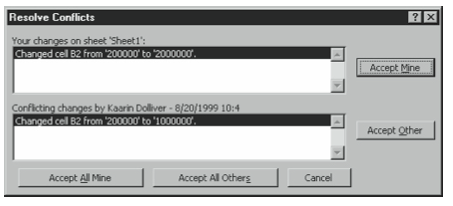
Excel does attempt to resolve any conflicts that arise from workbook sharing. When a user saves a workbook, Excel looks for conflicts—such as the same cell being changed by dif- ferent users. If Excel sees such a conflict, it displays the Resolve Conflicts dialog box (see Figure 7-11) and asks how the conflict should be resolved. One important aspect of this conflict resolution, however, is that the person who saves the workbook and, therefore, sees the Resolve Conflicts dialog box, determines which changes should be saved and which should be discarded.
Sharing Excel Workbooks with E-Mail
Excel’s File menu provides several commands, which you can use to share workbooks us- ing electronic mail. When you share workbooks in this manner, you simply attach the workbook to an e-mail message and then send the message and its attachment, the work- book, to another person.
Sending a Workbook via E-Mail
If you regularly use e-mail, you’ll find it very easy to share workbooks using mail. You sim- ply send e-mail messages laden with Excel workbooks.
To e-mail the open Excel workbook, follow these steps:M
- Choose the File menu’s Send To command.
Excel displays the Send To submenu, which lists commands for sharing workbooks us- ing electronic mail and, in some cases, other e-mail-like services, such as Microsoft’s Exchange Server. - Choose the Send To menu’s Mail Recipient (As Attachment) command.
Excel opens your default e-mail client, opens a new message, and attaches the workbook. Figure 7-12 shows how the Outlook Express e-mail client looks, but your e-mail client will probably look very similar even if you use one of the other popular e-mail programs.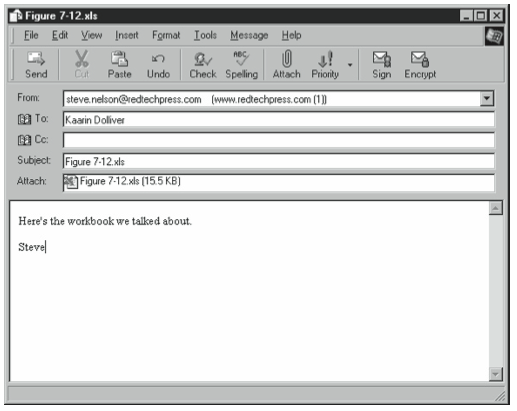
Figure 7-12. The Outlook Express message window with an Excel workbook attachment. - Complete and deliver the e-mail message in the usual way.
You complete your e-mail message in the usual way. For example, you need to provide the recipient’s e-mail name or alias. And you probably want to provide a message sub- ject and perhaps some message text to explain the message and your attachment. When you finish, send the message in the usual way.
Receiving a Workbook via E-Mail
You can also easily receive e-mail messages that contain Excel workbook attachments.
To receive and use an e-mailed Excel workbook, follow these steps:
- Start your e-mail program and retrieve your messages in the usual way.
Figure 7-13 shows the Outlook Express program window with the Inbox folder displayed. Other e-mail programs typically show your incoming messages in a similar way. The first message includes a paperclip icon in front of it to indicate that a file is “attached.”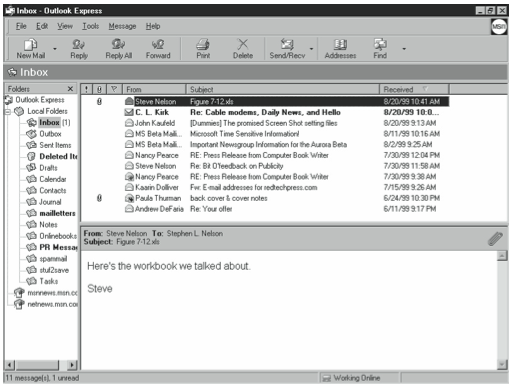
Figure 7-13. The Outlook Express Inbox folder showing incoming messages. - Open the e-mail message with the attachment.
Figure 7-14 shows the Outlook Express message window displaying a sample message with an Excel workbook attachment. Again, your e-mail client will probably look very similar even if you use another program.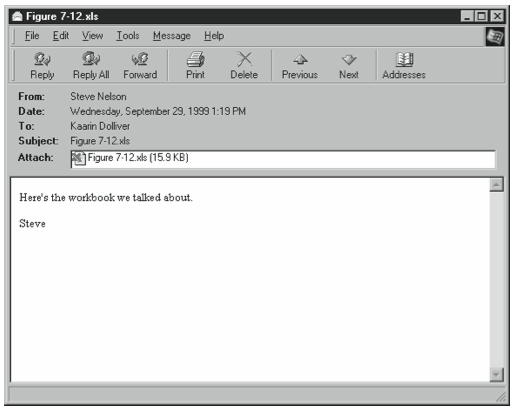
Figure 7-14. The Outlook Express message window with an Excel workbook attachment. - Save the attachment.
You can typically do this by right-clicking the attachment icon and then choosing the Save As command from the shortcut menu. The e-mail client then displays a Save As dialog box, and you use it to indicate where you want to save the workbook. - Open the workbook.
You open the workbook in any of the usual ways. For example, you can start Excel and then use the File menu’s Open command.
Avoiding E-Mail Attachment Problems
E-mail attachment problems may be occurring more infrequently these days as the e-mail clients and the mail servers get smarter. Nevertheless, you should be aware that two prob- lems are commonly encountered when sending attachments over the Internet: problems with attachment size and problems with attachment format.
Problems with attachment size stem from the fact that some mail servers limit attachment size. For example, a mail server may limit attachment size to less than one megabyte, and that may mean your largest Excel workbooks are too big to be attachments.
Problems with attachment format stem from the fact that an attachment can actually be included in a message in either of two formats: Uuencode or MIME. Some e-mail programs accept only one format or may by default assume that attachments use one of the formats. For example, an e-mail client may assume that attachments are Uuencode attachments and then become confused when trying to handle a MIME attachment.
While both problems are frustrating, fortunately neither problem is typically difficult to solve. If you encounter the first problem of attachment size, consult with the mail server admin- istrators—and ask to have the attachment size limit changed. If you encounter the second problem of incompatible attachments, consult the e-mail client documentation to deter- mine how to specify which format is used or assumed—and then make sure that both the sender’s and recipient’s e-mail clients use the same format.
Workbook Sharing with E-Mail
In the earlier chapter section, “Sharing Excel Workbooks Over a Network,” I noted that if you enable workbook sharing, Excel will allow multiple users to simultaneously open a work- book. Then when these users attempt to save their changes, Excel looks for conflicts and attempts to help users resolve conflicting changes.
It turns out that you can have Excel also perform this same conflict resolution with workbooks you’ve shared, such as through e-mail or by physically delivering the workbook on a floppy disk. To use Excel’s Workbook Sharing feature in these special cases, follow these steps:
- Turn on Workbook Sharing.
In order to merge workbooks, you need to first turn on the Workbook Sharing in the workbook by using the Tools menu’s Share Workbooks command. This is described in the previously referenced chapter section. - Create identical copies of the same workbook.
You can create an identical copy by using the File menu’s Save As command. Simply save the workbook using a new name. - Distribute separate copies of the workbook you want to share.
You can do this by e-mailing the workbook, as described in the earlier chapter section, “Sending a Workbook via E-Mail.” - Collect the workbooks once changes are made.
Once people have made their changes, collect the workbooks. Save them in the same folder location. - Open your master workbook.
The master workbook is the workbook in which you’ll collect all of the changes, and it’s probably the same workbook you used to create the workbook copies you distributed. - Choose the Tools menu’s Merge workbooks command.
Excel displays the Select Files To Merge Into Current Workbook dialog box (see Figure 7-15).
Figure 7-15. The Select Files To Merge Into Current Workbook dialog box. - Select the workbooks you want to merge.
The Select Files To Merge Into Current Workbook dialog box works in the same basic way as the Save As and Open dialog boxes. You use the Look In drop-down list box to select the drive and folder you want to open. The main box of the dialog box lists the Excel workbooks in the open folder. To select a workbook, click it. To select multiple workbooks, hold down the Ctrl key and then click each work. Then click OK. Excel begins merg- ing the changes from the selected workbooks into the master workbook.
Using E-Mail Routing Slips
If you choose the File menu’s Send To command, you’ll also notice a Routing Recipient command. The Routing Recipient command lets you build a list of e-mail addresses to which an Excel workbook can be sequentially routed, and then send the workbook to the first person on the list. When one recipient finishes with the workbook, Excel automatically routes, or sends, the workbook along to the next person on the list.
Sending a Workbook Using Routing Slips
To use the Routing Recipient command, open the workbook you want to share and then follow these steps:
- Choose the Routing Recipient command.
Excel displays the Routing Slip dialog box (see Figure 7-16).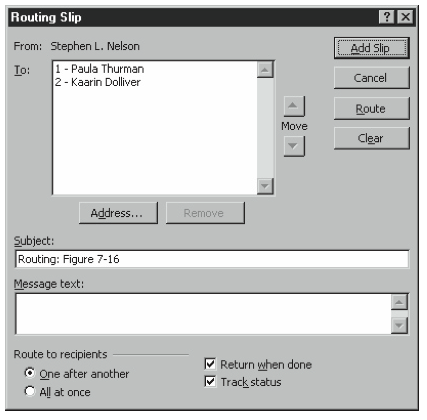
Figure 7-16. The Routing Slip dialog box you use to create a routing recipients list. - Build your list of recipients.
Click the Address button to display the Address Book. To add a name, click it and then click the To button. If you want to send the workbook to someone not yet in your Ad- dress Book, first add his or her name to your Address Book. You should add names in the same order as you want to route the workbook, but if you don’t, note that you can use the Move buttons to move a selected name up or down the routing list. - Optionally, provide a message subject and message text.
You can use the Subject and Message Text boxes to provide the e-mail message subject and message text. Each recipient sees this information. - Indicate you want to use sequential routing.
Click the One After Another option button to indicate that you want to use sequential routing. You don’t have to use sequential routing, but sequential routing is often desir- able. Sequential routing eliminates the need to resolve conflicting edits to a workbook. (What happens, of course, is that recipients will effectively resolve conflicts as they re- view the previous recipient’s work and make further changes.) - Route the workbook to the first routing recipient.
You can begin routing the workbook in two ways: immediately or later. If you want to immediately begin routing the workbook, click the Route button; Excel sends the work- book to the first routing recipient on your list. If you want to make more changes or post- pone routing, click the Add Slip button; Excel then saves your routing information. When you later want to send the workbook to the first routing recipient, choose the File menu’s Send To command and then choose the Send To submenu???s Next Routing command.
Receiving a Routed Workbook
You receive a routed workbook in the same manner as you receive other e-mail attachments, as described in the earlier section, “Receiving a Workbook via E-Mail.” When you finish with the workbook, however, choose the File menu’s Send To command and choose the Send To submenu’s Next Routing command to send the workbook to the next routing recipient.
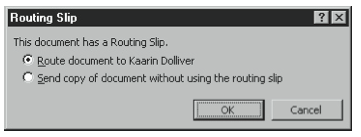
When you choose the Next Routing command, Excel displays the Routing Slip dialog box (see Figure 7-17.) Click the Route Document To option button, and then OK to send the workbook to the next recipient.
Leave a Reply