Microsoft Windows itself provides a powerful and easy-to-use tool for sharing data known as OLE, or Object Linking and Embedding. With OLE, you can transfer data between Excel and other Windows’ programs, as described in the paragraphs that follow.
How OLE Works
In order to make sense of OLE, it’s helpful both to understand the basic operation of the Windows clipboard and the terminology of OLE. The following paragraphs provide this background information.
Anytime you use the Copy or Cut command, Windows stores your copy of the copied or cut selection using the Clipboard. When you later choose the Paste command, the Win- dows program—this might be Excel—retrieves what is stored on the Clipboard and pastes it into the worksheet at the location of the cell marker or insertion bar.
While you most often use the Clipboard to move and copy data within a program like Excel, you can also use the Clipboard data between programs because the contents of the Clip- board are stored until you exit Windows.
OLE is simply the name that Microsoft has given to this Clipboard-based method of sharing document data. With OLE you can use a chart from an Excel workbook in a Microsoft Word document. In this case, and using the terminology of OLE, Excel is the server application, the Excel workbook is the source, Word is the client application, and the Word document is the container.
OLE objects can be either static, or embedded, which means that what gets stored in the container document is simply a copy. And OLE objects can also be dynamic, or linked, which means that the client application actually retrieves a picture of the actual data from the server application. With a linked object, this “picture” changes as the data changes.
Although OLE provides you with powerful opportunities to share data between programs, you’ll find it easy to use. You create an OLE connection by copying and pasting the data you want to share. Windows hides the complexity from you and takes care of the actual work of data sharing.
Creating an Embedded OLE Object
As an example of how to create an embedded OLE object, suppose that you do want to use an Excel chart created in a Word document. To easily create such an embedded OLE ob- ject, follow these steps:
- Open both the source and destination documents.
To most easily create embedded OLE objects, start both the server application and the client application. You should also open both the source document and the container document. If you’re working with brand-new, as-yet unsaved documents, first save them. - Select the chart object.
To select an object, simply click it. For example, to select the chart object shown in Fig- ure 7-1, simply click the chart.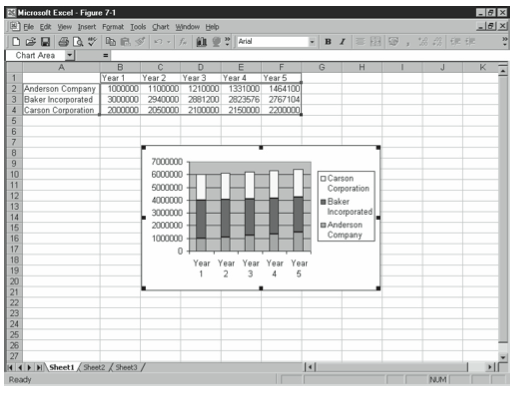
Figure 7-1. An Excel chart such as you might use for an OLE source document. - Copy the object to the clipboard.
You can copy and object to the clipboard by clicking the Copy toolbar button. Or you can choose the Edit menu’s Copy command. - Display the source document.
You could do this by clicking the document’s button on the Taskbar. If you wanted to copy the object to a Word document named Report, you would click the Report taskbar button. - Position the insertion point at the location where you want to paste the object.
You can typically position the insertion point by clicking the point in the document where you want to place the object. For example, if you wanted to paste a chart object after the first paragraph, as shown in Figure 7-2, you would click on the line following the first paragraph.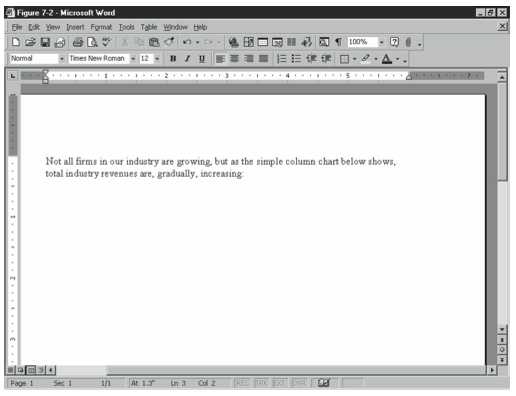
Figure 7-2. A Word document such as you might use for an OLE destination document. - Paste the chart object into the client application’s container document.
You can paste an object to the clipboard by clicking the Paste toolbar button. You can also choose the Edit menu’s Paste command. When you do, the client application (with Windows’ help) creates an embedded object that looks as much like the source document object as the server application, Windows, and the client application allow. In other words, Windows and Windows programs use the richest format available for the pasted object. Figure 7-3 shows the Excel chart from Figure 7-1 embedded in the Word document from Figure 7-2.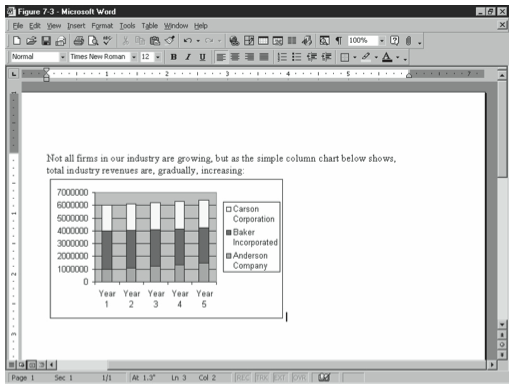
Figure 7-3. The Word document after adding the Excel chart object.
Creating a Linked OLE Object
You create a linked OLE object in almost the same way as you create an embedded OLE object. There’s just one minor twist. You use the Edit menu’s Paste Special command be- cause it lets you indicate you want to create a linked object. For example, to create a linked OLE object using the same Excel chart shown in Figure 7-1 and the same Word document shown in Figure 7-2, follow these steps:
- Open both the source and container documents.
Again, to easily create embedded OLE objects, both the server application and the cli- ent application must be running and both the source document and container document should be open. - Select the chart object.
As mentioned earlier, to select an object you simply click it. - Copy the object to the clipboard.
You can copy an object to the clipboard by clicking the Copy toolbar button or by choosing the Edit menu’s Copy command. - Display the source document.
You could do this by clicking the document’s button on the Taskbar. - Position the insertion point at the location where you want to paste the object.
You can typically position the insertion point by clicking the point in the document where you want to place the object. - Paste the chart object into the client application’s container.
This is the only step that works differently from pasting an embedded object. When you paste a linked object, you need to use the Edit menu’s Paste Special command. When you choose this command, the client program displays a Paste Special dialog box. (Fig- ure 7-4 shows Microsoft Word’s version of the Paste Special dialog box, but other program’s Paste Special dialog boxes look almost the same and work in the same basic way.) When the client program displays its Paste Special dialog box, click the Paste Link option button and click OK. Optionally, you can also select a format for the object from the As list box.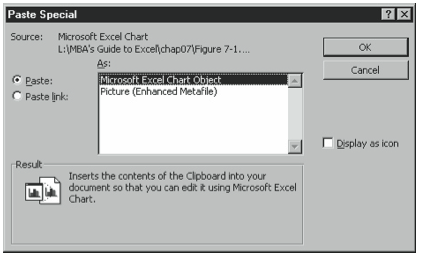
Figure 7-4. The Paste Special dialog box.
When you open a document into which you’ve placed linked OLE objects, the program asks whether you want to update the links. If you do, click Yes, and the client application retrieves updated information from the source document.
By the way, it’s possible to inadvertently break a link. For example, this may happen if the same source document is moved or renamed while the client application and container document are closed. In this case, you need to reestablish the link by repeating the steps you took to originally establish the link.
Editing OLE Objects
You can easily modify linked and embedded objects. To change an object, double-click it. The client application starts the server application and opens the appropriate source document. Once the server application is running and displaying the source, you can make your changes.
Inserting OLE Objects in Excel Workbooks
The object sharing method described in the preceding paragraphs works well in situations in which you want to share data between programs and display that shared data in the con- tainer document. You should also know, however, that Excel’s Insert menu provides an Object command, which you can use to place icons in a workbook that point to source documents.
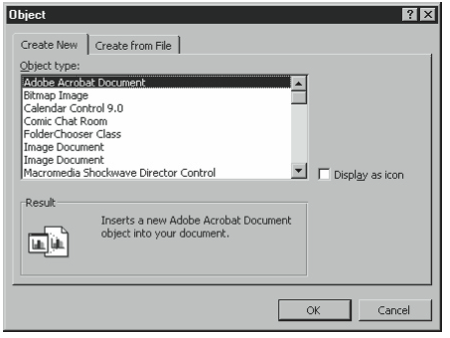
To use the Insert menu’s Object command to point to new OLE objects, choose the Insert menu’s Object command. When Excel displays the Object dialog box (see Figure 7-5), click the Create New tab, select the program necessary to create the object, and then click OK. Excel starts the server application, and you use it to create the new object. When you fin- ish creating the object, click outside the object—such as on a worksheet cell—to return to Excel. Use the Display As Icon check box to indicate whether you want to see a picture of the object or simply a clickable icon you can use to access the object.
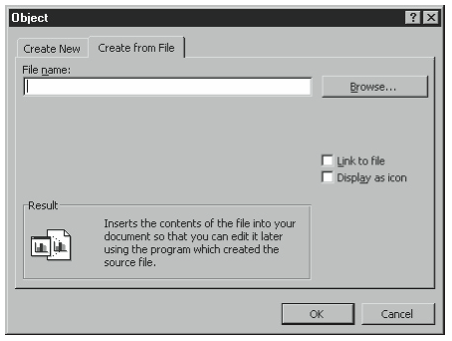
To use the Insert menu’s Object command to point to an existing document, you also choose the Insert menu’s Object command. When Excel displays the Object dialog box, however, you click the Create From File tab and then identify the file you want to use to create the object (see Figure 7-6). To identify the file, enter the complete pathname in the Name box or use the Browse button to display a dialog box you can use to search disks and folders for the file. Select the Link To File check box if you want to create a linked object. Select the Display As Icon check box to indicate whether you want to see a picture of the object or simply a clickable icon you can use to access the object.
Leave a Reply