Excel provides two ways of creating PivotCharts. If you’ve already created a PivotTable and want to chart the information on which it focuses, you can save time and space by creating a PivotChart directly from the PivotTable. If you haven’t created a PivotTable and are in- stead more interested in creating a PivotChart, you can create the PivotChart using the PivotTable and PivotChart Wizard without specifying the layout of a PivotTable.
Creating a PivotChart from an Existing PivotTable
To create a PivotChart from an existing PivotTable, select a cell in the PivotTable and click the Chart Wizard button on the PivotTable toolbar. Figure 8-10 shows a PivotChart based on the PivotTable in Figure 8-8.
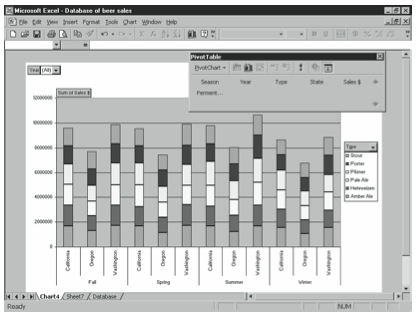
You manipulate PivotCharts in much the same way as you manipulate PivotTables—by dragging field buttons to different axes. You can also filter a PivotChart’s data to include only certain items in a field. To do this, click the down arrow on the right side of the field button and select or clear the check boxes to include or omit items from the PivotChart. Click OK to redraw the chart.
After you’ve created the PivotChart, you can click the Chart Wizard button on the PivotTable toolbar again to start the Chart Wizard and customize the PivotChart. Using the Chart Wizard, you can specify such items as chart type, axis titles, and legend placement.
Creating a PivotChart Directly from a Database
To create a PivotChart directly from a database, open the database and choose the Data menu’s PivotTable and PivotChart Report command. In step one of the wizard, click the PivotChart (With PivotTable) option button. In the second step, select the data you want to include in the PivotChart. In the last step, specify where you want Excel to put the new PivotChart. When you click Finish, Excel displays a new, blank PivotChart, as shown in Figure 8-11.
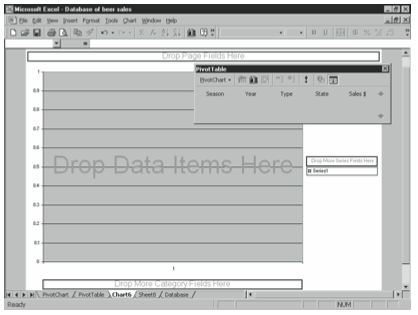
To add data to the PivotChart, drag the field buttons from the PivotTable toolbar to the various parts of the PivotChart until it displays the information you want. You can move fields to other axes by dragging them as well. To remove a field from a chart, drag its but- ton off the chart area.
After you’ve created the PivotChart, you can click the Chart Wizard button on the PivotTable toolbar again to start the Chart Wizard and customize the PivotChart. Using the Chart Wizard, you can specify such items as chart type, axis titles, and legend placement.
Leave a Reply